아두이노
가변저항 테스트
'김용환'
2011. 10. 4. 20:52
가변저항이라는 것을 처음을 알았다.
먼저 아래 싸이트 가본다.
http://arduino.cc/en/Tutorial/AnalogInput
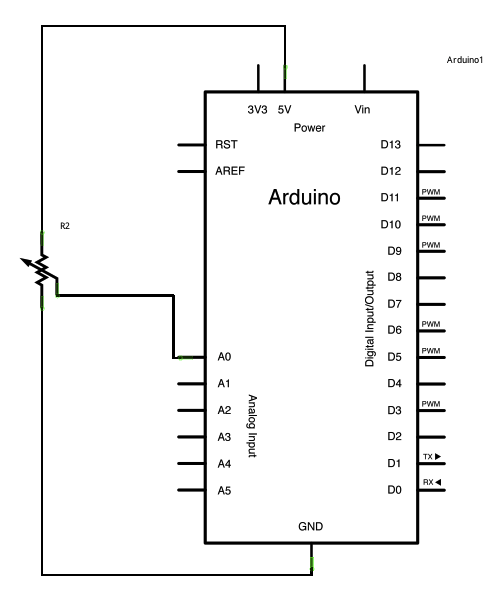
Fritzing 이라는 툴을 이용하면 배치도를 살펴볼 수 있다. 나같은 aduino 나 하드웨어 초보에겐 딱이다.

그리고, 아래 소스를 sketch에서 실행한다.
http://arduino.cc/en/Tutorial/AnalogInput
int sensorPin = A0; // select the input pin for the potentiometer
int ledPin = 13; // select the pin for the LED
int sensorValue = 0; // variable to store the value coming from the sensor
void setup() {
// declare the ledPin as an OUTPUT:
pinMode(ledPin, OUTPUT);
}
void loop() {
// read the value from the sensor:
sensorValue = analogRead(sensorPin);
// turn the ledPin on
digitalWrite(ledPin, HIGH);
// stop the program for <sensorValue> milliseconds:
delay(sensorValue);
// turn the ledPin off:
digitalWrite(ledPin, LOW);
// stop the program for for <sensorValue> milliseconds:
delay(sensorValue);
}
a0 input을 받아서 가변저항으로부터 받은 sensorValue를 받아 13핀에 연결된 LED를 High(킴)했다가.
센서값만큼 delay하고, LED를 LOW(끔)을 하도록 한다. 그리고, 다시 delay..
가변저항의 아날로그 값을 움직일 때마다 반짝거리게 한다.
