윈도우 이클립스에서 안드로이드 어플을 개발할 때 API 보는 것 대신 소스를 보려면, 두가지 중 하나를 하면 된다.
1. 소스를 다운받기
   tortoiseGit 프로그램을 이용해서 아래 주소에 git 파일을 가지고 clone한다. 
    https://android.googlesource.com/platform/frameworks/base.git  
2. 자바 소스 zip 파일 다운 받기
 https://github.com/android/platform_frameworks_base/tags 디렉토리에 접근해서 버전에 맞게 소스를 다운받으면 된다. 


예전에는 소스를 다운받는 구조로 했었는데.. 별로 안좋은 것 같다. 


웹 브라우져에서 https://github.com/android/platform_frameworks_base/tags  에 접속한다.


나는 안드로이드 2.3.3 어플을 개발중이므로, android_2.3.3_r1을 다운받는다.


안드로이드 소스 연동 이클립스에서 SurfaceView 클래스의 소스를 보려고 했을 때, 아래와 같은 화면이 나타난다.


여기서 Attach Source의  External File을 선택후, 다운받은 zip 파일을 연결한다. (사진에 그림을 잘 못 그렸음..)


아래와 같이 안드로드이 자바 소스를 확인할 수 있다. 


Posted by '김용환'
,


m2 eclipse plugin이 1.0 버전 업하면서 생긴 단순한 설정은 아래와 같이 처리한다.
http://knight76.tistory.com/entry/이클립스-STS-maven-builder-변경


컴파일을 잘 되는데, pom.xml 파일에 maven parent를 사용하는 부분에서 에러가 있다고 나온다. build life cycle에서 무엇인가 이슈가 있다.


원인을 찾아보니, 이클립스 싸이트의 m2e 플러그인에 대한 내용이 있다. 간단히 요약해보면 다음과 같다. 빌드시 명시적으로 문제의 소지가 있는 플러그인에 대해서 에러로 처리할테니, 무시하든지 추가하든지 하는 설정을 넣으라는 얘기이다. (m2eclipse 플러그인 개발자도 maven 때문에 고생한다…. )

http://wiki.eclipse.org/M2E_plugin_execution_not_covered

https://issues.sonatype.org/browse/MNGECLIPSE-823에 내용에 있는 것처럼 리소스들과 컴파일이 안되는 문제가 발생되기도 했다. 0.12 버전 이하에서는 이클립스 빌드시 maven을 사용해서 컴파일을 했었다. 사실 이클립스 플러그인 개발입장에서는 그저 maven에 위임하는데, 어떤 “ Plug excution”이 동작하여 예상치 못하게 파일(리소스)가 날아가(missing) 버리거나 JVM, OS 리소스 부족으로 문제를 일으키는 경우가 있었다.

이 문제를 해결해가 위해서 1.0 부터는 빌드 lifecycle에 명확한 방법(explicit instructions)을 제공하였다. 이것을 “project build lifecycle mapping” (lifecycle mapping)이라고  한다. pom.xml 설정에 maven 빌드와 별도로플러그 실행(execution)에 대한 정보를 넣을 수 있게 하였다.

예를 들어 project build lifecycle mapping 정보가 없는 경우에 대해서는 다음과 같이 m2 이클립스 플러그인에서 에러로 처리한다고 한다.

Plugin execution not covered by lifecycle configuration:
org.apache.maven.plugins:maven-antrun-plugin:1.3:run
    (execution: generate-sources-input, phase: generate-sources)
이 문제를 해결하기 위해서 ignore 또는 execute goal을 넣어야 한다. 


아래 에러 로그에 있는 내용이 바로 위에 작성한 위키의 내용과 일치한다.

Multiple annotations found at this line:
    - Plugin execution not covered by lifecycle configuration: org.codehaus.mojo:xml-maven-plugin:1.0:transform
     (execution: default, phase: process-resources)
    - Plugin execution not covered by lifecycle configuration: org.apache.maven.plugins:maven-antrun-plugin:1.3:run
     (execution: process-resources, phase: process-resources)
    - maven-dependency-plugin (goals "copy-dependencies", "unpack") is not supported by m2e.
    - Plugin execution not covered by lifecycle configuration: org.apache.maven.plugins:maven-antrun-plugin:1.3:run
     (execution: copy-base-resource, phase: generate-sources)


이 방식을 이용해서 아래와 같이 pom.xml 파일에 정리하였더니 더 이상 이클립에서 에러라고 처리되지 않는다.

<build>
        <pluginManagement>
            <plugins>
                <!--This plugin's configuration is used to store Eclipse m2e settings
                    only. It has no influence on the Maven build itself. -->
                <plugin>
                    <groupId>org.eclipse.m2e</groupId>
                    <artifactId>lifecycle-mapping</artifactId>
                    <version>1.0.0</version>
                    <configuration>
                        <lifecycleMappingMetadata>
                            <pluginExecutions>
                                <pluginExecution>
                                    <pluginExecutionFilter>
                                        <groupId>
                                            org.apache.maven.plugins
                                        </groupId>
                                        <artifactId>
                                            maven-antrun-plugin
                                        </artifactId>
                                        <versionRange>
                                            [1.3,)
                                        </versionRange>
                                        <goals>
                                            <goal>run</goal>
                                        </goals>
                                    </pluginExecutionFilter>
                                    <action>
                                        <ignore></ignore>
                                    </action>
                                </pluginExecution>
                                <pluginExecution>
                                    <pluginExecutionFilter>
                                        <groupId>
                                            org.codehaus.mojo
                                        </groupId>
                                        <artifactId>
                                            xml-maven-plugin
                                        </artifactId>
                                        <versionRange>
                                            [1.0,)
                                        </versionRange>
                                        <goals>
                                            <goal>transform</goal>
                                        </goals>
                                    </pluginExecutionFilter>
                                    <action>
                                        <ignore></ignore>
                                    </action>
                                </pluginExecution>
                                <pluginExecution>
                                    <pluginExecutionFilter>
                                        <groupId>org.apache.maven.plugins</groupId>
                                        <artifactId>maven-dependency-plugin</artifactId>
                                        <versionRange>[1.0.0,)</versionRange>
                                        <goals>
                                            <goal>copy-dependencies</goal>
                                        </goals>
                                    </pluginExecutionFilter>
                                    <action>
                                        <ignore />
                                    </action>
                                </pluginExecution>
                            </pluginExecutions>
                        </lifecycleMappingMetadata>
                    </configuration>
                </plugin>
            </plugins>
        </pluginManagement>
    </build>

Posted by '김용환'
,


최신 이클립스/ STS 에 포함되었던 maven plugin m2 eclipse가 버전업을 하면서 패키지가 변경되었다. (0.1 –> 1.0) maven 빌드는 되는데, 이클립스 에서의 소스상으로는 에러가 나오는 것처럼 볼 수 있다.


해결을 하려면, 다음과 같이 수정하면 컴파일이 된다.


<?xml version="1.0" encoding="UTF-8"?>
<projectDescription>
    <name>xxx-parent</name>
    <comment></comment>
    <projects>
    </projects>
    <buildSpec>
        <buildCommand>
            <name>org.eclipse.jdt.core.javabuilder</name>
            <arguments>
            </arguments>
        </buildCommand>
        <buildCommand>
           <name>org.maven.ide.eclipse.maven2Builder</name>
            <name>org.eclipse.m2e.core.maven2Builder</name>
            <arguments>
            </arguments>
        </buildCommand>
    </buildSpec>
    <natures>
        <nature>org.maven.ide.eclipse.maven2Nature</nature>
        <nature>org.eclipse.jdt.core.javanature</nature>
       <nature>org.eclipse.m2e.core.maven2Nature</nature>
        
    </natures>
</projectDescription>


* 참고 사항

구버전 (2.5.2.RELEASE)


신버전 (2.8.1.RELEASE)


그 외 .classpath  파일에 수정사항이 있다.

<?xml version="1.0" encoding="UTF-8"?>
<classpath>
<classpathentry kind="con" path="org.maven.ide.eclipse.MAVEN2_CLASSPATH_CONTAINER"/>
<classpathentry kind="con" path="org.eclipse.m2e.MAVEN2_CLASSPATH_CONTAINER"/>
</classpath>

이렇게 두개를 바꿔야 한다.

Posted by '김용환'
,


<서론>

이클립스에서 아두이노 코딩을 위한 컴파일 작업을 했고, (http://knight76.tistory.com/entry/이클립스eclipse에서-avr-코딩해서-아두이노arduino-로-이미지-업로드하기-1)
이번에는 avrdude를 이용해서 이미지 업로드하는 방법을 소개한다.


<본론>

1. AVRDude 설정

프로퍼티 설정으로 가서, c/c++ build / Settings의 Addtiontal Tool in ToolChain을 선택한다.

“AVRDude” 설정에 대해서 check on 한다.


AVRDude item을 선택하고, Command 라인에 대한 설정 내용은 다음과 같이 수정한다.

“${COMMAND} -F -V  -P com3  -b 115200  -p m328p -c arduino -C G:\Arduino-package\arduino-1.0\hardware\tools\avr\etc\avrdude.conf  -U flash:w:arduino-test.hex”


망치 버튼을 눌러 동작을 시켜본다.

avrdude 툴을 써서 잘 이미지(hex)를 업로드하는 것을 확인할 수 있다.


**** Build of configuration 328P_16MHz for project arduino-test ****

make all
Building target: arduino-test.elf
Invoking: AVR C++ Linker
avr-g++ -s -Os -o"arduino-test.elf"  ./src/main.o  ./ref/CDC.o ./ref/HID.o ./ref/HardwareSerial.o
./ref/IPAddress.o ./ref/Print.o ./ref/Stream.o ./ref/Tone.o ./ref/USBCore.o
./ref/WInterrupts.o ./ref/WMath.o ./ref/WString.o ./ref/new.o ./ref/wiring.o
./ref/wiring_analog.o ./ref/wiring_digital.o ./ref/wiring_pulse.o ./ref/wiring_shift.o    -lm -Wl,-Map,arduino-test.map,--cref -mmcu=atmega328p
Finished building target: arduino-test.elf
 
Create Flash image (ihex format)
avr-objcopy -R .eeprom -O ihex arduino-test.elf  "arduino-test.hex"
Finished building: arduino-test.hex
 
Invoking: Print Size
avr-size --format=avr --mcu=atmega328p arduino-test.elf
AVR Memory Usage
----------------
Device: atmega328p

Program:   20130 bytes (61.4% Full)
(.text + .data + .bootloader)

Data:        544 bytes (26.6% Full)
(.data + .bss + .noinit)


Finished building: sizedummy
 
Invoking: AVRDude
G:\Arduino-package\arduino-1.0\hardware\tools\avr\bin\avrdude -F -V  -P com3  -b 115200  -p m328p -c arduino -C G:\Arduino-package\arduino-1.0\hardware\tools\avr\etc\avrdude.conf  -U flash:w:arduino-test.hex

avrdude: AVR device initialized and ready to accept instructions

Reading | ################################################## | 100% 0.00s

avrdude: Device signature = 0x1e950f
avrdude: NOTE: FLASH memory has been specified, an erase cycle will be performed
         To disable this feature, specify the -D option.
avrdude: erasing chip
avrdude: reading input file "arduino-test.hex"
avrdude: input file arduino-test.hex auto detected as Intel Hex
avrdude: writing flash (20130 bytes):

Writing | ################################################## | 100% 3.23s

avrdude: 20130 bytes of flash written

avrdude done.  Thank you.

Finished building: avrdudedummy
 

**** Build Finished ****


이렇게 이클립스에서 사용하거나 따로 컴맨드 창에서 동작시켜도 된다.

>avrdude -P com3  -b 115200 -p m328p -c arduino -C../etc/avrdude.conf -F -e -U flash:w:test.hex


이런 설정은 하나하나 확인하면서 테스트했었는데. 그럴 필요가 없다. (소스 분석할 때는 없었는데/ ^^;; 완전 나의 삽질~ ㅎ)

hardware/arduino/boards.txt 파일을 보면 아래 arduino uno에 대한 설정 내용이 있다. 이 것만 잘 참조해도  avrdude 바로 쓸 수 있다.


uno.name=Arduino Uno
uno.upload.protocol=arduino
uno.upload.maximum_size=32256
uno.upload.speed=115200
uno.bootloader.low_fuses=0xff
uno.bootloader.high_fuses=0xde
uno.bootloader.extended_fuses=0x05
uno.bootloader.path=optiboot
uno.bootloader.file=optiboot_atmega328.hex
uno.bootloader.unlock_bits=0x3F
uno.bootloader.lock_bits=0x0F
uno.build.mcu=atmega328p
uno.build.f_cpu=16000000L
uno.build.core=arduino
uno.build.variant=standar


<예제 파일 돌려보기>

1. 아두이노 스타일 코딩로 코딩하는 것은 어렵지 않다. 잘 동작된다.

main.cpp


#include <Arduino.h>


void setup() {
   pinMode(13, OUTPUT);
}

void loop() {
   digitalWrite(13, HIGH);   // set the LED on
   delay(1000);              // wait for a second
   digitalWrite(13, LOW);    // set the LED off
   delay(1000);              // wait for a second
}

int main(void) {
 init();

#if defined(USBCON)
 USB.attach();
#endif
 
 setup();
   
 for (;;) {
  loop();
  if (serialEventRun) serialEventRun();
 }
       
 return 0;
}


2. 그냥 코딩도 잘 돌아간다.
(http://www.javiervalcarce.eu/wiki/Program_Arduino_with_AVR-GCC에 있는 예제)

main.cpp


#include <avr/io.h>
#include <util/delay.h>

int main (void)
{
  unsigned char counter;
  DDRB = 0xFF;

  while (1)
    {
      PORTB = 0xFF;

      /* wait (10 * 120000) cycles = wait 1200000 cycles */
      counter = 0;
      while (counter != 50)
 {
   /* wait (30000 x 4) cycles = wait 120000 cycles */
   _delay_loop_2(30000);
   counter++;
 }

      /* set PORTB.2 low */
      PORTB = 0x00;

      /* wait (10 * 120000) cycles = wait 1200000 cycles */
      counter = 0;
      while (counter != 50)
 {
   /* wait (30000 x 4) cycles = wait 120000 cycles */
   _delay_loop_2(30000);
   counter++;
 }
    }

  return 1;
}


<project source>


마치며..

이클립스 환경설정하면서 많은 감을 잡은 것 같다. 조금씩 avr도 공부하면서 펌웨어의 즐거움을 즐겨봐야지..
Posted by '김용환'
,


<서론>

아두이노 1.0을 바탕으로 윈도우 OS 이클립스에서 아두이노 (AVR) 코딩할 수 있는 환경을 구축하는 방법을 알아보고자 한다.


<본론>

1. 가장 먼저 “아두이노 개발툴(pde)”를 설치한다.

나는 1.0 버전으로 설치했다.


2. make

mingw 에서 나온 윈도우용 make 유틸리티를 설치한다.

나는 5.1.5 버전을 사용중이다.

http://sourceforge.net/projects/mingw/files/OldFiles/MinGW%205.1.4/MinGW-5.1.4.exe/download 

custom 지정을 잘한다. make을 반드시 설치 목록에 넣어줘야 한다.


설치된 mingw/bin 디렉토리를 path에 추가한다.

mingw32-make.exe 파일을 make.exe 파일로 하나 복사해서 사용한다.


정상적으로 동작하는지 확인한다.


make 유틸리티가 윈도우 path에 등록되어 있지 않으면 이클립스상에서 컴파일은 되지 않는다.


**** Build of configuration 328P_16MHz for project arduino-test ****

make all

Error: Cannot run program "make" (in directory "G:\android\workspace\arduino-test\328P_16MHz"): CreateProcess error=2, ??d?? Æ???; ?; ¼? ¾ø

**** Build Finished ****


3. avr Eclipse 플러그인을 설치한다.

http://avr-eclipse.sourceforge.net/wiki/index.php/Plugin_Download 를 참조한다.
플러그인 update 주소는 다음과 같다.

http://avr-eclipse.sourceforge.net/updatesite

AVREclipseInstallUpdatesiteScreenshot.png

(출처 : http://avr-eclipse.sourceforge.net/wiki/index.php/Plugin_Download)


4. Preferneces 설정의 AVR Path를 변경

체인툴의 path를 설정해야 한다.


path source는 custom으로 하고 설치된 아두이노의 디렉토리를 지정한다.


위치 지정은 다음과 같다.

AVG-GCC : hardware\tools\avr\bin
GNU make : hardware\tools\avr\utils\bin
AVR Header Files : hardware\tools\avr\avr\include
AVRDude : hardware\tools\avr\bin

c/c++ / build item에서 Build all configuration in each project를 check on 한다.


5. 프로젝트 환경

먼저  c++ 프로젝트를 생성한다.


소스 디렉토리를 생성한다.


프로젝트의 properties를 설정한다.  내 꺼는 arduino uno이다. MCU type은 Atmgega328P , clock은 16000000로 지정한다.


Properties 중 c/c++ build 설정의 “Manage Configuration” 설정을 선택한다.


아래와 같은 팝업창에서 “New”버튼을 선택한다.


328P_16MHz 라는 이름으로 새로운 설정을 추가한다.


OK 버튼을 누르면, 아까 봤던 팝업창이 뜨는데 Set Avice 버튼을 선택한다. 나머지 설정은 다 지운다.


AVR tab를 선택하고, 항목에서 Enable시킨다.


C/C++ Build –> Settings 설정에서 Configuration 설정에서 328P_16MHz를 선택한다.


Settings 아이템의 Additional Tools in Toolchain에서 아래 두 옵션만 check on 한다. (우선은 컴파일하고 바이너리 이미지까지만 만드는 것까지이다.)
”Generate HEX file for flash memroy”, “Print Size”,


Tool Settings 밑의 AVR Compiler /Debugging을 선택하고, 정보를 확인한다.


AVR Compiler의 Optimization 설정을 다음과 같이 수정한다. 

-Os, 체크박스를 모두 off, "-ffunction-sections -fdata-sections”을 optimization flag로 설정한다.


C/C++ Build/Settings 탭의 Tool Settings/AVR Compiler/Language Standard 화면의 옵션을 모두 check off 한다.


AVR Compiler의 Directories 설정의 플러스 아이콘을 선택한다.


AVR Compiler 의 Directories에 아래 디렉토리를 추가한다. header 파일과 구현 파일들이다.

"G:\Arduino-package\arduino-1.0\hardware\arduino\cores\arduino" : 아두이노 h 및 cpp

"G:\Arduino-package\arduino-1.0\hardware\arduino\variants\standard" : pins_arduino.h


AVR Compiler 처럼 AVR C++ Compiler 부분도 똑같이 수정해야 한다. (사실 cpp로 동작하기 때문에 c++ compiler 설정을 더 잘해야 한다.)


AVR C++ Compiler/Debugging 설정을 잘 되었는지 확인한다.


Optimization 설정도 똑같이 한다.


Language Standard도 똑같이 설정한다.


Directories도 동일하게 설정한다.


6. 링커 설정

AVR C++ Linker에서 다음과 같이 설정한다.

Command는 avr-gcc,

Command line pattern은 “ ${COMMAND} -s -Os ${OUTPUT_FLAG}${OUTPUT_PREFIX}${OUTPUT} ${INPUTS} -lm ${FLAGS}”으로 지정한다. (복사하면서 유니코드가 들어갈 수 있어 빌드 실패가 일어날 수 있음)


그리고, Library 설정은 특별히 하지 않는다.


7. 아두이노 디렉토리를 import한다.

Import/Filesystem 을 이용해서 Include된 디렉토리를 참조하게 한다. 이 파일들로 인해서 컴파일 시 참조가 되게 한다.


8. 컴파일


main.cpp 파일에 있는 setup(), loop()를 주석을 제거하거나 exmple 소스 하나를 구현해본다.


#include <Arduino.h>


void setup() {
      pinMode(13, OUTPUT);
}

void loop() {
      digitalWrite(13, HIGH);   // set the LED on
      delay(1000);              // wait for a second
      digitalWrite(13, LOW);    // set the LED off
      delay(1000);              // wait for a second
}

int main(void)
{
    init();

#if defined(USBCON)
    USB.attach();
#endif
   
    setup();
   
    for (;;) {
        loop();
        if (serialEventRun) serialEventRun();
    }
       
    return 0;
}


잘 생각해보면, 아두이노  개발 툴 에서 setup(), loop()를 구현한 코드에서 main.cpp 와 링킹하면서 바이너리가 만들어지는 모델이라는 점을 쉽게 이해할 수 있다.


컴파일을 하려면 툴바에 있는 망치를 선택한다.


컴파일하면, 다음과 같이 잘 되는지 확인가능 하다. 빌드 과정을 보면서 지금까지 셋팅한 정보로 컴파일되는지 확인한다.


**** Build of configuration 328P_16MHz for project arduino-test ****

make all
Building file: ../src/main.cpp
Invoking: AVR C++ Compiler
avr-g++  -I"G:\Arduino-package\arduino-1.0\hardware\arduino\cores\arduino" -I"G:\Arduino-package\arduino-1.0\hardware\arduino\variants\standard" -Wall -g2 -gstabs -Os -ffunction-sections -fdata-sections -fno-exceptions -mmcu=atmega328p -DF_CPU=1600000UL -MMD -MP -MF"src/main.d" -MT"src/main.d" -c -o "src/main.o" "../src/main.cpp"
Finished building: ../src/main.cpp
 
Building target: arduino-test.elf
Invoking: AVR C++ Linker
avr-g++ -s -Os -o"arduino-test.elf"  ./src/main.o  ./ref/CDC.o ./ref/HID.o ./ref/HardwareSerial.o
./ref/IPAddress.o ./ref/Print.o ./ref/Stream.o ./ref/Tone.o
./ref/USBCore.o ./ref/WInterrupts.o ./ref/WMath.o ./ref/WString.o
./ref/new.o ./ref/wiring.o ./ref/wiring_analog.o ./ref/wiring_digital.o
./ref/wiring_pulse.o ./ref/wiring_shift.o    -lm -Wl,-Map,arduino-test.map,--cref -mmcu=atmega328p
Finished building target: arduino-test.elf
 
Create Flash image (ihex format)
avr-objcopy -R .eeprom -O ihex arduino-test.elf  "arduino-test.hex"
Finished building: arduino-test.hex
 
Invoking: Print Size
avr-size --format=avr --mcu=atmega328p arduino-test.elf
AVR Memory Usage
----------------
Device: atmega328p

Program:   20130 bytes (61.4% Full)
(.text + .data + .bootloader)

Data:        544 bytes (26.6% Full)
(.data + .bss + .noinit)


Finished building: sizedummy
 

**** Build Finished ****


Navigator 또는 Project Explorer로 보면, 아래와 같이 make 파일과 hex, elf 파일이 생성되는지 확인할 수 있다.


이제는 이미지 업로드하는 작업을 한다.

Posted by '김용환'
,


이클립스-아두이노를 연동하여 특정 글에 리플이 추가되거나 삭제될 때마다 램프를 깜박이게 하려는 데모를 작성했다. 하다 보니. me2day api 연동 글이 되어 버렸다.


1. api 사용자키를 확인

미투 웹의 설정화면에 접속하여 api 사용자 키를 확인한다.

http://me2day.net/knight111111/setting


2. 애플리케이션 키 발급 및 사용

m2api 를 사용하기 위해서 애플리케이션 키를 발급해야 한다.

http://me2day.net/api/front/appkey


http://me2day.net/me2/app/edit_appkey 에 접속하고, 애플리케이션 키 (appkey) 값을 확인한다.

미투 개발서버에서 메일로 웹에서 보았던 애플리케이션 키(appkey) 값을 전달해준다.

미투 Open API(http://dev.naver.com/openapi/apis/me2day/me2api_intro#metwo2)에 따르면, 헤더에 ‘me2_application_key’을 이용하거나, GET/POST 파라미터에 'akey'를 넣으면 된다고 하며 모든 m2api 호출시 반드시 넣어야 한다.


나는 웹 파라미터를 이용한 방식을 사용해 본다. 웹으로 동작되는지 확인한다.

http://me2day.net/api/get_posts/$계정명$.xml?akey=발급받은애플리케이션키
(발급 받은 애플리케이션 키(appkey)가 없어도 볼 수는 있다.)

http://me2day.net/api/get_posts/knight111111.xml?akey=7f4e6364d7f4dd8bf7072c11f20b3be0


3. 인증

글쓰기, 친구신청, 쪽지 쓰기 등 사용자 본인만 할 수 있는 것을 하려면, 인증을 해야 한다.

미투 API 인증 절차(http://dev.naver.com/openapi/apis/me2day/me2api_intro#metwo3)가 있다. 나는 이미 있는 라이브러리를 쓰기로 했다.

미투 API 참고자료(http://dev.naver.com/openapi/apis/me2day/me2api_intro#metwo4)에 보면 외부 개발자가 다양한 언어별로 클라이언트 라이브러리 개발한 것이 있다. 자바의 경우는 예전에 많든 소스와 구글 프로젝트 코드(http://code.google.com/p/me2day-api/) 가 있는데, 나는 간단히 테스트만 할 것이라 me2api-java14-src.tar.gz 만 다운받았다.


코드는 아래와 같이 사용하면 포스트가 된다.  (실제 인증에 대해서 궁금한 사람은 Me2API 클래스의 request()메소드를 참조한다.)

        Me2API me2api = new Me2API();
        me2api.setUsername("knight111111");
        me2api.setApplicationKey("7f4e6364d7f4dd8bf7072c11f20b3be0");
        me2api.setUserKey("67000463");
        me2api.post("test");


4. 댓글자 확인

http://me2day.net/api/get_posts/knight111111.xml  URL을 통해서 body 글을 확인하고 포스트의 id가 “pyhja7h-665uq”인지 확인한다.

http://me2day.net/api/get_comments/xml?post_id=pyhja7h-665uq URL은 댓글 정보를 알 수 있다.  이 정보를 파싱하는 방법이 있지만, 이미 있는 api가 있으므로 그것을 활용한다.


me2api-java14 클라이언트 라이브러리를 이용해서 reply-test 댓글을 단다.

Me2API me2api = new Me2API();
me2api.setUsername("knight111111");
me2api.setApplicationKey("7f4e6364d7f4dd8bf7072c11f20b3be0");
me2api.setUserKey("67000463");
me2api.createComment("pyhja7h-665uq", "reply-test");


4. 아두이노 연동

특정 글이 리플이 달릴 때마다 아두이노에서 램프를 깜박이게 하는 것이다. 이 데모를 따라하기 위해서는 “http://knight76.tistory.com/entry/프로세싱processing-이클립스연동” , “http://knight76.tistory.com/entry/아두이노-프로세싱-연동-어플에서-버튼을-누르면-불-깜빡거리게-하기” 정보를 참조하면 좋다.


이클립스 프로젝트의 Referered Libraries 정보이다.

이클립스의 자바 코드

import java.io.IOException;
import java.util.List;
import java.util.Timer;
import java.util.TimerTask;

import javax.xml.parsers.ParserConfigurationException;

import net.me2day.java.Comment;
import net.me2day.java.Me2API;
import processing.core.PApplet;
import processing.serial.Serial;

public class Me2dayReplyTest extends PApplet {
    static int replyNumber = 0;
    Serial port;

    /**
     * 초기화
     */
    public void setup() {
        System.out.println("setup - start");
        System.out.println("Available serial ports:" + Serial.list().length);
        for (String comport : Serial.list()) {
            System.out.println(comport);   
        }
       
        if (Serial.list().length == 0) {
            System.out.println("## NO DETECT ##:");
            System.out.println("end programe");
            System.exit(0);
        }
       
        // comment 개수
        replyNumber = getCommentNumber();
       
        // list[1]에 com3로 arduino가 붙어 있다.
        port = new Serial(this, Serial.list()[1], 9600);
        ScheduleJob job = new ScheduleJob();
        Timer jobScheduler = new Timer();
        jobScheduler.schedule(job, 0, 3000);
        System.out.println("setup - end");
    }
   
    // draw 메소드를 override 해줘야 JApplet을 이용해서 serial 을 사용하는 코드에서 문제가 나지 않는다.
    public void draw() {
    }

    static public void main(String args[]) {
        PApplet.main(new String[] { "--bgcolor=#F0F0F0", "Me2dayReplyTest" });
    }

    /**
     * Timer Task를 상속함
     *
     */
    class ScheduleJob extends TimerTask {
        @Override
        public void run() {
            int commentNumber = getCommentNumber() ;
            if (commentNumber != replyNumber) {
                blink();
                replyNumber = commentNumber;
            }
        }
    }

    /**
     * 특정 글에 대한 Comment 개수 구하기
     * @return
     */
    public int getCommentNumber() {
        Me2API me2api = null;
        try {
            me2api = new Me2API();
        } catch (ParserConfigurationException e) {
            e.printStackTrace();
        }
        me2api.setApplicationKey("7f4e6364d7f4dd8bf7072c11f20b3be0");
        me2api.setUserKey("67000463");
        List<Comment> list = null;
        try {
            list = me2api.getComments("pyhja7h-665uq");
        } catch (IOException e) {
            e.printStackTrace();
        }
        System.out.println("list number : " + list.size());
        return list.size();
    }
   
    /**
     * 깜빡, 깜빡~
     */
    public void blink() {
        for (int i = 0; i < 3 ; i++) {
            // turn on led
            port.write(255);
            try {
                Thread.sleep(1000);
            } catch (InterruptedException e) {
                e.printStackTrace();
            }
            port.write(0);
            try {
                Thread.sleep(1000);
            } catch (InterruptedException e) {
                e.printStackTrace();
            }
        }

    }
}

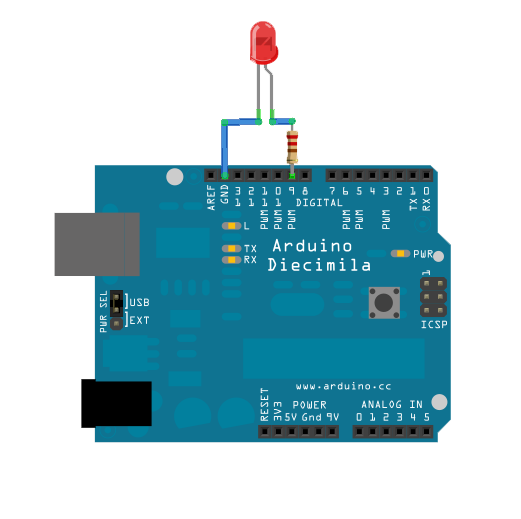
아두이노 소스는 기존과 동일하게 Serial로 전달된 정보를 받고 LED에 값을 변경한다.


const int ledPin = 8;      // the pin that the LED is attached to

void setup()

{

  // initialize the serial communication:

  Serial.begin(9600);

  // initialize the ledPin as an output:

  pinMode(ledPin, OUTPUT);

}

void loop() {

  byte brightness;

  // check if data has been sent from the computer:

  if (Serial.available()) {

    // read the most recent byte (which will be from 0 to 255):

    brightness = Serial.read();

    // set the brightness of the LED:

    analogWrite(ledPin, brightness);

  }

}


특정 글에 comment를 넣어주는 클라이언트 코드는 아래와 같이 하거나.. 직접 글에 댓글을 달아주면 된다.

public class Me2Test2 {
    public static void main(String[] args) throws Exception {
        Me2API me2api = new Me2API();
        me2api.setUsername("knight111111");
        me2api.setApplicationKey("7f4e6364d7f4dd8bf7072c11f20b3be0");
        me2api.setUserKey("67000463");
        me2api.createComment("pyhja7h-665uq", "reply-test");
    }
}


테스트하니 정상적으로 잘 동작한다.


참고) java.lang.RuntimeException: Error inside Serial.write() 발생시에 대한 대처 방법

아래와 같은 에러가 난다면, draw() 메소드를 반드시 override 해야 한다. draw() 메소드를  override 하면 아래 에러는 더 이상 발생하지 않는다.


java.lang.NullPointerException
    at processing.serial.Serial.write(Unknown Source)
    at Me2dayReplyTest.blink(Me2dayReplyTest.java:98)
    at Me2dayReplyTest$ScheduleJob.run(Me2dayReplyTest.java:63)
    at java.util.TimerThread.mainLoop(Timer.java:555)
    at java.util.TimerThread.run(Timer.java:505)
Exception in thread "Timer-0" java.lang.RuntimeException: Error inside Serial.write()
    at processing.serial.Serial.errorMessage(Unknown Source)
    at processing.serial.Serial.write(Unknown Source)
    at Me2dayReplyTest.blink(Me2dayReplyTest.java:98)
    at Me2dayReplyTest$ScheduleJob.run(Me2dayReplyTest.java:63)
    at java.util.TimerThread.mainLoop(Timer.java:555)
    at java.util.TimerThread.run(Timer.java:505)


 //   public void draw() {
//    }
->

    public void draw() {
    }

Posted by '김용환'
,


<시작>
아두이노와 프로세싱을 가지고 이것 저것 해보면서, 굳이 프로세싱 (processing) 언어의 경우는 굳이 processing ide를 쓰지 않아도 되겠다 하는 생각이 들었다. 그래서 윈도우에서 이클립스환경에서 쉽게 개발할 수 있도록 셋팅을 해보았다. 이렇게 한다면, 이클립스 + 아두이노로만 개발이 가능해 지고 쉽게 개발할 것이다.

기존에 했던 작업
http://knight76.tistory.com/entry/아두이노-프로세싱-연동-어플에서-버튼을-누르면-불-깜빡거리게-하기
http://knight76.tistory.com/entry/프로세싱-언어가-자바-언어로-변환


<본론>
프로세싱과 아두이노와 연동했던 소스를 참조해서 만들어본다.
"http://knight76.tistory.com/entry/아두이노-프로세싱-연동-어플에서-버튼을-누르면-불-깜빡거리게-하기"

아두이노 소스는 그대로 사용한다.

이제 프로세싱에 해당되는 것만 이클립스 환경에서 쓸 수 있게 한다.
다운받은 프로세싱 (processing) 패키지의 리소스를 잘 이용하여 Referenced Libraries 에 추가한다.

1. 프로젝트 생성
자. 이제 이클립스 프로젝트를 새로 생성한다.
그리고, 속성-Java Build Path를 지정한다.
UI만 쓸꺼면, 프로세싱 설치 디렉토리의 serial.jar만 추가하면 된다. 그러나 나는 serial 통신까지 하는 예제이기 때문에 조금 신경써야 한다. ^^

2. Build Path 추가
프로세싱 디렉토리의 lib 디렉토리의 core.jar (ui 담당), jna.jar를 build path에 추가한다.
그 다음 modes\java\libraries\serial\library 디렉토리의 RXTXcomm.jar와 serial.jar 을 build path에 추가한다.

3. Serial.dll 복사
제일 중요한 것은 serial 통신을 위한 dll 파일이다. 이 파일은 아주 다행히 프로세싱 설치 디렉토리에 있다.

설치 디렉토리의 modes\java\libraries\serial\library\windows32 디렉토리에 있는 rxtxSerial.dll 파일을
c:\windows\system32에 복사한다.

만약 rxtxSerial.dll 파일이 존재하지만 않으면, 다음의 에러가 발생한다.

java.lang.UnsatisfiedLinkError: no rxtxSerial in java.library.path thrown while loading gnu.io.RXTXCommDriver
java.lang.UnsatisfiedLinkError: no rxtxSerial in java.library.path
     at java.lang.ClassLoader.loadLibrary(ClassLoader.java:1682)
     at java.lang.Runtime.loadLibrary0(Runtime.java:822)
     at java.lang.System.loadLibrary(System.java:993)
     at gnu.io.CommPortIdentifier.<clinit>(CommPortIdentifier.java:83)
     at processing.serial.Serial.list(Serial.java:549)
     at Springer.setup(Springer.java:33)
     at processing.core.PApplet.handleDisplay(PApplet.java:1390)
     at processing.core.PGraphics.requestDisplay(PGraphics.java:690)
     at processing.core.PApplet.run(PApplet.java:1562)
     at java.lang.Thread.run(Thread.java:613)
Error while running applet.
java.lang.RuntimeException: Error inside Serial.ports()
     at processing.serial.Serial.errorMessage(Serial.java:583)
     at processing.serial.Serial.list(Serial.java:564)
     at Springer.setup(Springer.java:33)
     at processing.core.PApplet.handleDisplay(PApplet.java:1390)
     at processing.core.PGraphics.requestDisplay(PGraphics.java:690)
     at processing.core.PApplet.run(PApplet.java:1562)
     at java.lang.Thread.run(Thread.java:613)


4. 클래스 생성
마지막으로 클래스를 생성한다.

import processing.core.PApplet;
import processing.serial.Serial;

public class SketchTest extends PApplet {
 Serial port;
 boolean button = false;
 int x = 150;
 int y = 150;
 int w = 100;
 int h = 75;

 public void setup() {
  size(400, 400);
  println("Available serial ports:");
  println(Serial.list());
  port = new Serial(this, Serial.list()[1], 9600);
 }

 public void draw() {
  if (button) {
   background(255);
   stroke(0);
  } else {
   background(0);
   stroke(255);
  }

  fill(175);
  rect(x, y, w, h);
 }

 public void mousePressed() {
  if (mouseX > x && mouseX < x + w && mouseY > y && mouseY < y + h) {
   button = !button;
  }

  if (button == true) {
   // turn on led
   port.write(255);
  } else {
   // turn off led
   port.write(0);
  }
 }

 static public void main(String args[]) {
  PApplet.main(new String[] { "--bgcolor=#F0F0F0", "SketchTest" });
 }
}


5. 클래스를 실행한다.
Run Application, Run Applet 다 되니 상관없다.


6. 애플리케이션 테스트를 한다.


<결론>
동작 아주 잘된다. 깜빡~ 깜빡~


USB 씨리얼 통신을 이클립스에서 자바 언어로 연동을 쉽게 할 수 있다는 점은 상당히 앞으로 창의력을 키워줄 것이다.


<참고>
관련된 라이브러리 추가 (win 32 기준)

Posted by '김용환'
,

안드로이드 플러그인이 설치된 이클립스에서 새로운 프로젝트를 생성한다.
Create proejcty from existing sample을 선택하면 Sample 컴보박스가 뜬다.


여기서 예제들을 선택하고 개념을 파악하면 쉽다.


Posted by '김용환'
,


마인드 스톰 NXT을 잘 쓰기 위해서는 안드로이드 개발 환경을 셋팅해야 한다. 내일 부터 잘 쓸 수 있을 것 같다.


1. Motoroi 환경 설정

설정 -> 응용프로그램 -> 개발 -> USB 디버깅, 켜진 상태로 유지 를 on으로 셋팅


2. PC 에 드라이버 설치

http://www.mymotorola.co.kr/product/PrdDownProduct.aspx?id=0045

32비트 OS이면 USB Driver 버튼을 선택하고, 압축파일에 있는 driver installer를 설치한다.

3. motorio를 pc usb 포트에 꽂는다.
그러면, 윈도우 7이라면,  제어판 -> 장치관리자 의 디스크 드라이브에 Motorloa xt720 drive와 ADB Interface로 mot composit ADB interface가 생긴 것을 확인할 수 있다.


4. 이클립스를 설치한다.  난 STS가 편해서 STS로 설치
http://www.springsource.com/downloads/sts


아래 설치

Windows springsource-tool-suite-2.7.1.RELEASE-e3.7-win32-installer.exe 361MB


5. 안드로이드 SDK 설치

안드로이드 개발자 싸이트에 접속하여
http://developer.android.com/index.html

다운로드 페이지에 접속하여 윈도우 설치 판을 설치한다.
http://developer.android.com/sdk/index.html


설치하고 나면, SDK Manager를 실행하냐구 물어본다. 실행하면 설치한다.


6. 이클립스 플러그인 설치
메뉴에서  Help->install new software를 선택하고, 주소에 다음 내용을 넣는다.
https://dl-ssl.google.com/android/eclipse/


약관이 뜨면, 승인하고, Next, Finish~


7. SDK와 연동
메뉴에서 Window -> Preferences 로 들어가면 왼쪽 두번째에 android가 보인다


SDK 위치(C:\Program Files\Android\android-sdk(를 SDK Location 란에 넣고, ok 버튼을 클릭한다.
그런데.. 디렉토리 명안에서 스페이스가 있으면 문제가 된다.


invalid command-line parameter: Files\Android\android-sdk 이렇게 뜰 수 있다.

C:\Progra~1\Android\android-sdk  이렇게 SDK Location을 채워줘야 한다.


Installed package에 설치되었는지 확인하고, 없으면, 설치해야 한다. 만약 없다면.. http://developer.android.com/sdk/android-2.2.html 를 본다. sdk android 2.2는 sdk api 12라고 나온다.
available packages 에서 두가지를 선택한다.


Virtual device 에서 new 버튼을 선택한다.


다음과 같이 설정한다.


9. 에뮬레이터를 돌려본다.
Virtual devices에서 Start 버튼을 선택한다.


여기까지는 기본 개발환경 셋팅이다.


10. 이클립스 DDMS를 선택한다.


DDMS 화면에서 보면, 모토롤라가 연결되었음을 확인할 수 있다.


Devices의 카메라 아이콘을 선택하면, 캡쳐도 할 수 있다.


11. 간단한 어플을 돌려본다.

Android 프로젝트, 2.2 버전으로 맞추놓고 프로젝트를 생성한다.

Run AS-> Run Android App 하면, motori 어플이 실행되는지 지켜보면 된다.


환경 셋팅 완료. 내일은 안드로이드 블루투쓰~ 공부
Posted by '김용환'
,

일반적인 것
http://www.javajigi.net/pages/viewpage.action?pageId=155

에디터에서의 소스 이동
http://eclipse.dzone.com/articles/quick-ways-navigate-eclipse?utm_source=feedburner&utm_medium=feed&utm_campaign=Feed:%20javalobby/frontpage%20%28Javalobby%20/%20Java%20Zone%29&utm_content=Google%20Reader

기타 
http://blog.insightbook.co.kr/entry/이클립스-단축키-일람표를-공개합니다

http://kkamagui.springnote.com/pages/432649

http://decoder.tistory.com/39
Posted by '김용환'
,