먼저 authenticator:로 시작하는 라인을 찾고 다음과 같이 변경한다.


authenticator: PasswordAuthenticator 


이전과 같이 변경하면 클라이언트가 클러스터에 연결할 때 사용자 이름과 암호가 필요하다는 것을 카산드라에 알린다. 그러나 사용자가 로그인할 때마다 접근을 제한하지는 않는다. 접근을 제한하려면 권한을 활성화해야 한다. authorizer:로 시작하는 라인을 찾아서 다음과 같이 변경한다.


authorizer: CassandraAuthorizer 


이제 클러스터는 사용자에게 주어진 권한에 따라 로그인 사용자의 접근을 제한할 것이다. 해당 권한 설정을 적용하려면 카산드라 인스턴스를 재시작해야 한다.


사용자 계정, google을 설정한다.


CREATE USER 'google'

WITH PASSWORD 'strongpassword'

NOSUPERUSER;


system_auth 키 스페이스에서 roles 테이블에 접근해 슈퍼 유저와 기존 사용자 계정을 살펴볼 수 있다.


SELECT role, is_superuser FROM "system_auth"."roles";


키 스페이스 이름과 테이블 이름 사이에 마침표를 사용하면 USE 문으로 활성화한 키 스페이스와 상관없이 system_auth 키 스페이스를 살펴볼 것을 CQL에 알린다.


알다시피 사용자 계정은 system_auth.roles 테이블에 매우 투명하게 저장된다.


 role               | is_superuser

----------------+--------------

      cassandra |         True

google           |        False

(2 rows)


암호가 저장되는 위치와 방법이 궁금할 수 있을 것이다. 해당 정보는 동일 테이블인 system_auth.roles의 salted_hash 필드에 저장되어 있다. 암호는 일반 텍스트로 저장되지 않고 bcrypt 해시로 저장된다.


권한 목록은  다음과 같이 확인할 수 있다.


 SELECT * FROM system_auth.role_permissions;


 role           | resource                           | permissions

----------------+------------------------------------+--------------------------------

      cassandra |               roles/data_analytics | {'ALTER', 'AUTHORIZE', 'DROP'}

google |                     data/my_status |                     {'SELECT'}


참조 :

https://docs.datastax.com/en/cassandra/3.0/cassandra/configuration/secureConfigNativeAuth.html


https://support.datastax.com/hc/en-us/articles/207932926-FAQ-How-to-recover-from-a-lost-superuser-password


Posted by '김용환'
,

go 앱을 docker빌드할 때 ENV를 쓰지 않아도 된다!!!


자세한 내용은 이곳을 참조했다.

https://hub.docker.com/_/golang/


Main.go 소스는 다음과 같다.


package main


import (

    "fmt"

)


func main() {

    fmt.Println("Hello World")

}


Dockerfile은 다음과 같다. 


FROM golang:onbuild


RUN mkdir /app

ADD . /app/

WORKDIR /app

RUN go build -o main .

CMD ["/app/main"]


이제 빌드와 실행을 해본다.


$ docker build -t example .

Sending build context to Docker daemon  4.096kB

Step 1/6 : FROM golang:onbuild

# Executing 3 build triggers...

Step 1/1 : COPY . /go/src/app

Step 1/1 : RUN go-wrapper download

 ---> Running in eb597cae57ef

+ exec go get -v -d

Step 1/1 : RUN go-wrapper install

 ---> Running in 3cc20f3cc840

+ exec go install -v

app

 ---> 11d942c55dfb

Removing intermediate container 4eca92f17e78

Removing intermediate container eb597cae57ef

Removing intermediate container 3cc20f3cc840

Step 2/6 : RUN mkdir /app

 ---> Running in 1035dea0ce0d

 ---> 9fbe4249fc32

Removing intermediate container 1035dea0ce0d

Step 3/6 : ADD . /app/

 ---> 8950d77f106e

Removing intermediate container d43b4043d9bf

Step 4/6 : WORKDIR /app

 ---> 465bff3b7275

Removing intermediate container d21a6bdc6c31

Step 5/6 : RUN go build -o main .

 ---> Running in 9e1c1b5a0123

 ---> 9e27407b57d4

Removing intermediate container 9e1c1b5a0123

Step 6/6 : CMD /app/main

 ---> Running in 4dbe90267d84

 ---> a8861bcaebad

Removing intermediate container 4dbe90267d84

Successfully built a8861bcaebad

Successfully tagged example:latest


실행 결과는 다음과 같다.


$ docker run -it --rm --name my-example example

Hello World

'go lang' 카테고리의 다른 글

[golang] imported and not used  (0) 2017.09.05
go 컨퍼런스 자료  (0) 2017.09.01
[golang] if 예제  (0) 2017.08.29
[golang] 반복문 - for / 문 예제  (0) 2017.08.29
[golang] 타입 확인하는 방법 - reflect.TypeOf  (0) 2017.08.29
Posted by '김용환'
,


ssh tunning하고 rsync를 하다가 아래와 같은 에러를 보게 되었다. (필요하다면 strace를 보면 된다)


channel 1: open failed: administratively prohibited: open failed


/etc/ssh/sshd_config 파일에 포워딩 기본 설정이 no로 되어 있다. yes로 바꾸면 동작한다.


AllowTcpForwarding no

->

AllowTcpForwarding yes


Posted by '김용환'
,

ubuntu 16에서 

root권한으로 실수할만한 예제를 테스트해봤다.


다행히 rm -rf /은 fail safe되어 안전하다. 


# rm -rf /

rm: it is dangerous to operate recursively on '/'

rm: use --no-preserve-root to override this failsafe


그러나 crontab은 여전히 그대로이다.. -r 사용하면 다 날아감..


$ crontab -l


* * * * * echo "hello"

$ crontab -r

$ crontab -l

no crontab for deploy


Posted by '김용환'
,


먼저 zookeeper 서버를 실행한다. 


$./bin/zookeeper-server-start.sh config/zookeeper.properties


kafka 서버를 실행한다. 최소 3대


$ ./bin/kafka-server-start.sh config/server-1.properties


$ ./bin/kafka-server-start.sh config/server-2.properties


$ ./bin/kafka-server-start.sh config/server-3.properties


각 설정 파일에 순서대로 설정을 변경한다.


listeners=PLAINTEXT://:포트

broker.id=아이디

log.dirs=/tmp/kafka-logs_파일번호


토픽을 생성한다.


$./bin/kafka-topics.sh --create --zookeeper localhost:2181 --replication-factor 1 --partitions 1 --topic test


만약 토픽 생성시 에러가 발생했다면 카프카 서버가 없어서 발생할 수 있다. 


Error while executing topic command : replication factor: 1 larger than available brokers: 0

[2017-09-14 17:10:04,315] ERROR org.apache.kafka.common.errors.InvalidReplicationFactorException: replication factor: 1 larger than available brokers: 0

 (kafka.admin.TopicCommand$)


실제 데이터 입력한다.


$ ./bin/kafka-console-producer.sh --broker-list localhost:9092 --topic test


 bin/kafka-console-consumer.sh --bootstrap-server localhost:9093 --topic test


Posted by '김용환'
,

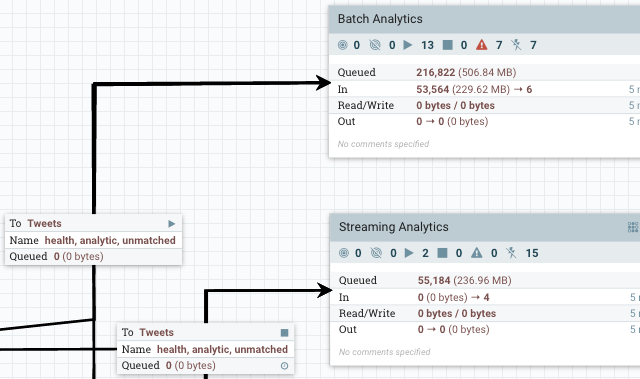
Apache NIFI

Cloud 2017. 9. 12. 20:32


apache nifi는 (배치가 아닌) 실시간으로 data 처리와 분배 기능을 제공하는 툴이다. 


저용량 트래픽에서는 실제 사용할만한 녀석으로 보인다.


기능면으로 봤을 때는 매력적이다.


대용량 트래픽(테라 급)에서도 잘 동작하는 지 테스트해봐야 할 것 같다. 


Posted by '김용환'
,

hadoop의 파일 시스템 용량과 파일 개수를 확인하고 싶을 때에 hadoop dfs, hadoop fs 커맨드를 실행한다. 


hadoop 의 count 커맨드는 hadoop 디렉토리의 내용을 설명한다.


hadoop dfs -count [-q] [-h] <path> 로 실행할 수 있다.


(버전에 따라 hadoop fs로 할 수 있다)


/google1 디렉토리에는 DIR_COUNT, FILE_COUNT, CONTENT_SIZE, PATHNAME 를 보고 싶다면 다음을 실행한다. 


$ hadoop dfs -count /google1


      589243      7518116    191011332057185 /google1


사람이 읽을 수 있는 단위로 보고 싶다면 -h를 붙인다. 


$ hdfs dfs -count -h /google1


     575.4 K        7.2 M            173.7 T /google1


좀 더 자세한 정보를 보려면 -q를 사용한다.  쿼터 정보를 포함한다. 

QUOTA, REMAINING_QUATA, SPACE_QUOTA, REMAINING_SPACE_QUOTA, DIR_COUNT, FILE_COUNT, CONTENT_SIZE, PATHNAME


디렉토리에 쿼터가 없다면 none이라고 뜬다.

$ hdfs dfs -count -h -q /google1
        none             inf            none             inf      575.4 K        7.2 M            173.7 T /google1


디렉토리 쿼터가 있다면 다음처럼 보일 수 있다.


$ hdfs dfs -count -q -h /q-google

      20.8 M          12.1 M           1.5 P         738.1 T      651.0 K        8.1 M            254.0 T /q-goolge


'hadoop' 카테고리의 다른 글

[phoenix] phoenix - jdbc 연동하기  (0) 2017.10.11
[phoenix] PQS  (0) 2017.10.11
[hive] reducer에 메모리 할당하기  (0) 2017.07.27
[hive] 장치에 남은 공간이 없음 에러..  (0) 2017.03.27
[hive] missing EOF at '...' near 에러  (0) 2017.03.15
Posted by '김용환'
,


golang에는 고루틴이라는 concurrency를 제공한다.


아래 예제는 한번에 동시에 실행하는 예제로서 클로져를 실행하는 코드이다.

 fmt.Scanln()은 입력을 기다리는 함수로서 고루틴이 모두 완료할 때까지 기다린다. 

package main

import (
"fmt"
"time"

)

func main() {
for i := 0; i <= 5; i++ {
go func() {
t := time.Now()
fmt.Println(t)
fmt.Println("Hello, World")
}()
}

fmt.Scanln()

}


결과는 다음과 같다.


2017-09-08 20:18:30.304976947 +0900 KST

Hello, World

2017-09-08 20:18:30.304985595 +0900 KST

Hello, World

2017-09-08 20:18:30.305044938 +0900 KST

Hello, World

2017-09-08 20:18:30.305051478 +0900 KST

Hello, World

2017-09-08 20:18:30.305007134 +0900 KST

Hello, World

2017-09-08 20:18:30.305108262 +0900 KST

Hello, World


runtime.GOMAXPROCS(n)은 프로세서를 얼마나 사용할지 cpu에 알린다.


package main

import (
"fmt"
"time"
"runtime"
)

func main() {
runtime.GOMAXPROCS(5)

//for i := 0; i <= 9000000 * 900000; i++ {
for i := 0; i <= 5; i++ {
go func() {
t := time.Now()
fmt.Println(t)
fmt.Println("Hello, World")
}()
}

fmt.Scanln()

}


cpu 모니터링을 해보면 확실히 알 수 있다.


모든 cpu를 활용하고 싶다면 runtime.NumCPU() 코드를 사용한다.

package main

import (
"fmt"
"time"
"runtime"
)

func main() {
fmt.Println(runtime.NumCPU())
runtime.GOMAXPROCS(runtime.NumCPU())

//for i := 0; i <= 9000000 * 900000; i++ {
for i := 0; i <= 5; i++ {
go func() {
t := time.Now()
fmt.Println(t)
fmt.Println("Hello, World")
}()
}

fmt.Scanln()

}


참고로 go 1.5부터는 rutnime.GOMAXPROCS()를 설정하지 않으면 모든 cpu를 사용하는 것이 디폴트이다.


다음은 channel 예제이다. channel은 go 루틴에서 사용되는 공용 변수이다. 

package main

import (
"fmt"
)

func multifly(value int, ch chan int) {
ch <- value * value
}

func main() {
channel := make(chan int)
go multifly(10, channel)
result := <-channel
fmt.Println(result)
}

채널(channel)을 생성하고 가지고 논 다음, 채널(channel) 값을 일반 변수에 저장한다. 


결과 값은 100이다.


참고로 multifly를 호출할 때 go를 사용하지 않으면 deadlock 에러가 발생한다.


fatal error: all goroutines are asleep - deadlock!


채널은

channel <- 값 : channel에 값 저장
x: <- channel : 채널에 값이 저장될 때까지 기다리고 x에 값을 할당한다. 


하지만 channel 값을 할당하지 않고 대기하는 의미로 쓰일 수도 있다. (예, 시그널)

package main


func multifly(value int, ch chan int) {
ch <- value * value
}

func main() {
channel := make(chan int)
go multifly(10, channel)
<-channel
}


채널에 2개의 버퍼를 사용하고 싶다면 다음과 같이 사용한다. 

buffer := make(chan bool, 2)


운영 체제 시그널을 고루틴으로 처리할 수 있다. 


package main

import (
"fmt"
"os/signal"
"os"
"syscall"
)

func main() {
sigs := make(chan os.Signal, 1)
done := make(chan bool, 1)
signal.Notify(sigs, syscall.SIGINT, syscall.SIGTERM)
go func() {
sig := <-sigs
fmt.Println()
fmt.Println(sig)
done <- true
}()

fmt.Println("awaiting signal")
<-done
fmt.Println("exiting")
}


실행결과는 다음과 같다. 중간에 Ctrl+C(SIGINT)를 보내야 종료된다.


$ go run Test.go

awaiting signal

^D

^E

^C

interrupt

exiting

'golang' 카테고리의 다른 글

ts2dt 타임스탬프를 날짜로 변경해주기  (0) 2019.10.11
go 언어의 gc 소개 자료.  (0) 2018.07.19
[golang] 매개 변수 받기  (0) 2017.09.08
[golang] 에러(error) 예제  (0) 2017.09.07
[golang] defer 예제  (0) 2017.09.07
Posted by '김용환'
,


ssh tunning을 통해 내부 망에서 외부 망으로 연결할 수 있다. 관련 예제를 소개한다.


A 서버에서 B 서버를 통해 외부 망으로 접근할 수 있도록 터널링하는 예제이다. -v는 내부 구조를 알기 위해..


$ ssh -v -L 61514:rsync.apache.org:873 deploy@tunnel.interal.google.io  -i /root/.ssh/repo


 OpenSSH_6.6.1, OpenSSL 1.0.1f 6 Jan 2014

debug1: Reading configuration data /root/.ssh/config

debug1: Reading configuration data /etc/ssh/ssh_config

debug1: /etc/ssh/ssh_config line 19: Applying options for *

debug1: Connecting to tunnel.interal.google.io [1.1.1.1] port 22.

debug1: Connection established.

debug1: permanently_set_uid: 0/0

debug1: identity file /root/.ssh/repo type -1

debug1: identity file /root/.ssh/repo-cert type -1

debug1: Enabling compatibility mode for protocol 2.0

debug1: Local version string SSH-2.0-OpenSSH_6.6.1p1 Ubuntu-2ubuntu2.8

debug1: Remote protocol version 2.0, remote software version OpenSSH_7.2p2 Ubuntu-4ubuntu2.2

debug1: match: OpenSSH_7.2p2 Ubuntu-4ubuntu2.2 pat OpenSSH* compat 0x04000000

debug1: SSH2_MSG_KEXINIT sent

debug1: SSH2_MSG_KEXINIT received

debug1: kex: server->client aes128-ctr hmac-sha1-etm@openssh.com none

debug1: kex: client->server aes128-ctr hmac-sha1-etm@openssh.com none

debug1: sending SSH2_MSG_KEX_ECDH_INIT

debug1: expecting SSH2_MSG_KEX_ECDH_REPLY

debug1: Server host key: ECDSA

debug1: Host 'tunnel.interal.google.io' is known and matches the ECDSA host key.

debug1: Found key in /root/.ssh/known_hosts:19

debug1: ssh_ecdsa_verify: signature correct

debug1: SSH2_MSG_NEWKEYS sent

debug1: expecting SSH2_MSG_NEWKEYS

debug1: SSH2_MSG_NEWKEYS received

debug1: SSH2_MSG_SERVICE_REQUEST sent

debug1: SSH2_MSG_SERVICE_ACCEPT received

debug1: Authentications that can continue: publickey,gssapi-keyex,gssapi-with-mic,password

debug1: Next authentication method: gssapi-keyex

debug1: No valid Key exchange context

debug1: Next authentication method: gssapi-with-mic

debug1: Next authentication method: publickey

debug1: Trying private key: /root/.ssh/tunnel

debug1: key_parse_private2: missing begin marker

debug1: read PEM private key done: type RSA

debug1: Authentication succeeded (publickey).

Authenticated to tunnel.interal.google.io ([1.1.1.1]:22).

debug1: Local connections to LOCALHOST:61514 forwarded to remote address rsync.apache.org:873

debug1: Local forwarding listening on 127.0.0.1 port 61514.

debug1: channel 0: new [port listener]

debug1: Local forwarding listening on ::1 port 61514.

bind: Cannot assign requested address

debug1: channel 1: new [client-session]

debug1: Requesting no-more-sessions@openssh.com

debug1: Entering interactive session.

debug1: client_input_global_request: rtype hostkeys-00@openssh.com want_reply 0

debug1: Sending environment.

debug1: Sending env LANG = en_US.UTF-8

Welcome to Ubuntu 16.04.3 LTS (GNU/Linux 4.4.0-93-generic x86_64)


 * Documentation:  https://help.ubuntu.com

 * Management:     https://landscape.canonical.com

 * Support:        https://ubuntu.com/advantage

Last login: Thu Sep  7 23:49:54 2017


ps -ef로 보면 연결이 잘 되었다는 것을 확인할 수 있다. 


실제 소켓 단에서도 잘 연결되었는지 확인하려면 A 서버, B 서버에서 소켓을 확인한다.


A 서버에서 확인하기


$ netstat -anp

tcp        0      0 1.1.1.1:22      3.3.3.3:61518    ESTABLISHED -


B 서버에서 확인하기   


$ netstat -tpln

(No info could be read for "-p": geteuid()=1000 but you should be root.)

Active Internet connections (only servers)

Proto Recv-Q Send-Q Local Address           Foreign Address         State       PID/Program name

tcp        0      0 127.0.0.1:61514         0.0.0.0:*               LISTEN      -


Posted by '김용환'
,


go언어에서 매개 변수를 받을 수 있다. 기본 값을 


package main

import (
"fmt"
"flag"
)

func main() {
id := flag.String("id", "iiiii", "aaaaa")
name := flag.String("name", "nnnnn", "bbbbb")

flag.Parse()
fmt.Println("id:", *id)
fmt.Println("name:", *name)
fmt.Printf("%v %v\n", *id, *name)
}


결과는 다음과 같다. 디폴트값을 넣은 효과가 발휘된다.


$ ./Test -id=1 -name=samuel

id: 1

name: samuel

1 samuel


$ ./Test  -name=samuel

id: iiiii

name: samuel

iiiii samuel


$./Test -id=1

id: 1

name: nnnnn

1 nnnnn


flag.PrintDefaults()와 flag.Args(), flag.Arg(i)에 대한 쓰임을 살펴본다. 


원하는 매개 변수가 정해지지 않았다면 flag.PrintDefaults()를 통해 flag.String()에서 정의된 내용이 나타나고,


flag.Args()는 주어진 매개 변수외 추가로 매개 변수가 주어졌다면 확인할 수 있는 api이다. 

package main

import (
"fmt"
"flag"
"os"
)

func main() {
id := flag.String("id", "iiiii", "aaaaa")
name := flag.String("name", "nnnnn", "bbbbb")

if *id == "" || *name == "" {
flag.PrintDefaults()
os.Exit(1)
}

flag.Parse()
fmt.Println("id:", *id)
fmt.Println("name:", *name)
fmt.Printf("%v %v\n", *id, *name)

fmt.Println(flag.Args())
fmt.Println(flag.Arg(0))


}


결과는 다음과 같다.


./Test -id=1 -name=samuel a b c

id: 1

name: samuel

1 samuel

[a b c]

a


'golang' 카테고리의 다른 글

go 언어의 gc 소개 자료.  (0) 2018.07.19
[golang] 고루틴(go routine) 예제  (0) 2017.09.08
[golang] 에러(error) 예제  (0) 2017.09.07
[golang] defer 예제  (0) 2017.09.07
[golang] interface(인터페이스) 예제  (0) 2017.09.06
Posted by '김용환'
,